
TL;DR:
- Performing regular, preventive roof maintenance extends your roof’s lifespan and saves substantial repair costs. Homeowners should inspect their roofs twice annually, starting with ground-level and attic checks, and only access the roof if necessary, using proper safety precautions. Different roof types require tailored inspection and cleaning methods to ensure longevity and avoid warranty issues.
A home roof maintenance checklist is a systematic set of tasks designed to identify and address roof issues before they become costly repairs. Roofing professionals call this practice “preventive roof care,” and it is the single most reliable way to extend your roof’s lifespan by years. Routine maintenance prevents minor problems from becoming expensive interior leaks and premature replacements. With the right schedule, tools, and inspection sequence, you can protect your property without climbing on the roof for most tasks. This guide gives you everything you need to follow a practical roof maintenance schedule in 2026.
What does a home roof maintenance checklist include?
A complete home roof maintenance checklist covers four core categories: visual inspection, cleaning, minor repairs, and documentation. Each category targets a different failure point, from granule loss on asphalt shingles to drainage blockages in gutters. Skipping any one of them leaves gaps that weather and time will exploit. The Asphalt Roofing Manufacturers Association (ARMA) and roofing inspection guides consistently identify flashing failures, clogged gutters, and algae growth as the top three preventable causes of premature roof failure.
Routine checklists help homeowners detect costly damage early and save 60 to 80 percent on repairs compared to emergency interventions. That figure reflects the difference between catching a cracked pipe boot seal in spring versus discovering a water-stained ceiling in August. The checklist is not just a to-do list. It is a cost-control tool.
How often should you inspect your roof?
The answer is more specific than most homeowners expect. Follow this schedule:
-
Spring inspection (highest priority): Check for damage from winter freeze-thaw cycles, including ice dams, cracked caulk, lifted shingles, and shifted gutters. Spring is the critical season for catching winter damage before it accelerates deterioration.
-
Fall inspection: Clear debris, check flashing seals, and prepare drainage systems before freezing temperatures arrive.
-
Post-storm check (within 48 hours): After any major storm, perform a quick ground-level scan for missing shingles, displaced flashing, or visible debris impact.
-
Monthly ground-level scan: A two-minute look from the yard with binoculars catches obvious problems between formal inspections.
Professional inspections every 3 to 5 years provide assessments of underlying decking and structural integrity that go beyond what any DIY inspection can reach, particularly for roofs over 15 years old. Many roofing warranties also require documented professional inspections at set intervals, so check your warranty terms before skipping this step.
Pro Tip: Schedule your spring inspection for late March or early April in Texas. By then, winter stress is fully visible but summer heat has not yet begun compounding shingle wear.
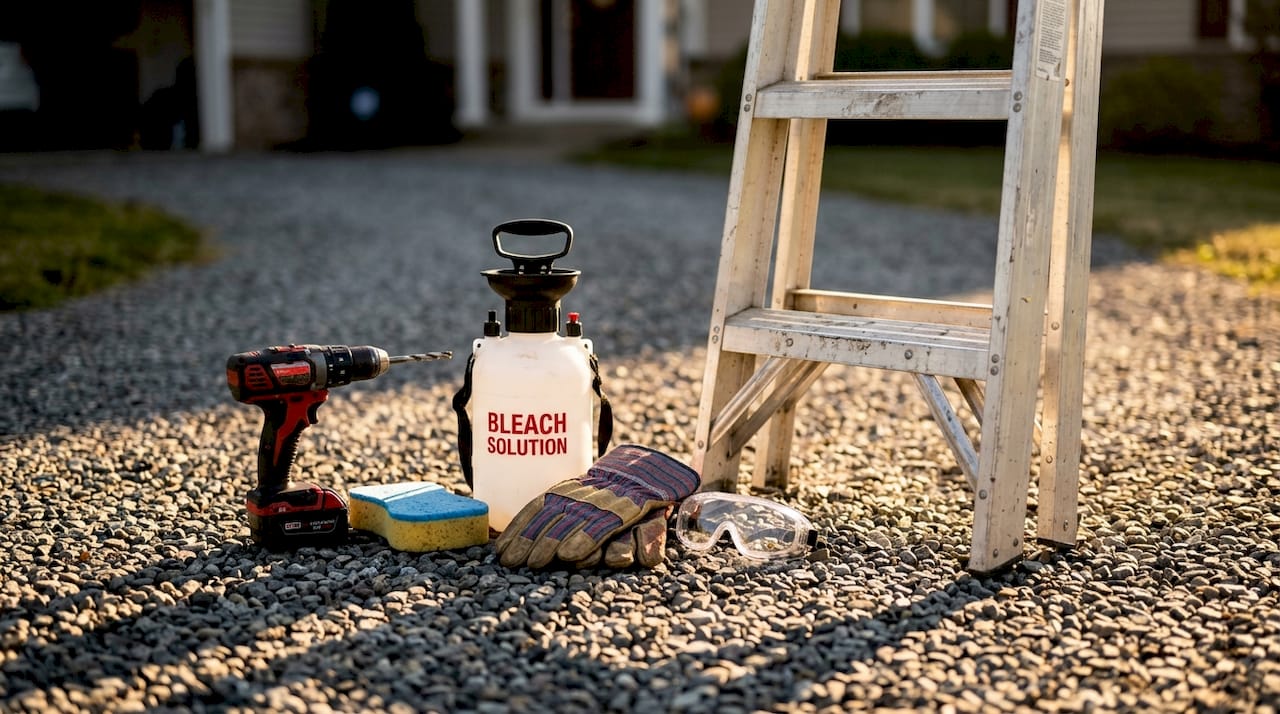
What tools do you need for roof maintenance?
You do not need specialized contractor equipment for most maintenance tasks. The table below covers the core toolkit.
| Tool | Purpose | Notes |
|---|---|---|
| Binoculars | Ground-level visual inspection | 8×42 magnification works well for most roof pitches |
| Extension ladder | Safe roof access when needed | Use a ladder standoff to protect gutters |
| Garden hose | Gutter flushing and drainage testing | Avoid pressure washers on shingles |
| Pump sprayer | Applying algae treatment solutions | Chemical-resistant model required |
| Chemical-resistant gloves | Handling bleach-based cleaning solutions | Nitrile or neoprene, not latex |
| Safety harness | Fall protection during roof access | OSHA-rated, anchored to ridge |
| Smartphone or camera | Photo documentation of findings | Wide-angle lens helps on steep pitches |
| Roof rake | Removing snow or debris from ground level | Telescoping aluminum models reach most roofs |
Key safety rules apply before you access any roof:
-
Never work on a wet, icy, or frost-covered surface.
-
Always have a second person present when using a ladder.
-
Wear rubber-soled shoes with ankle support.
-
Call a professional for any task on a pitch steeper than 6:12 or on a roof showing structural compromise.
85% of roof problems are visible from the ground using binoculars, which means most homeowners can complete a thorough inspection without ever stepping onto the roof surface. That statistic should shift how you think about safety: the default position is ground-level observation, not roof access.
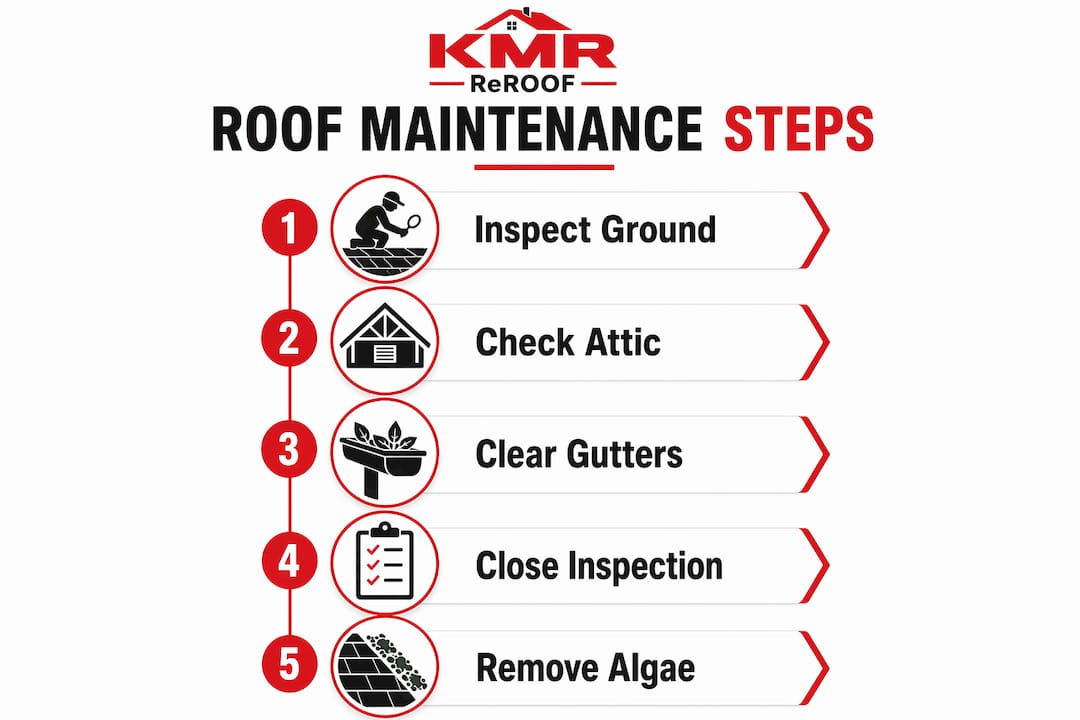
Step-by-step roof inspection guide for homeowners
Follow this sequence for a complete seasonal roof checkup. It moves from low-risk to higher-risk tasks, so you gather maximum information before deciding whether roof access is necessary.
Step 1: Ground-level visual scan
Stand at each corner of your property and use binoculars to scan the full roof surface. Look for missing or displaced shingles, sagging ridge lines, visible flashing gaps, and any areas where the roof deck appears to bow. Check the gutters for granule accumulation, which signals shingle wear. Granules in gutters after a storm are normal. Consistent granule loss between storms is not.
Step 2: Attic inspection
Attic inspections reveal moisture intrusion months before visible leaks appear on interior ceilings, making this the most underused step in most homeowner checklists. Bring a flashlight and look for water stains on the decking, daylight visible through the roof boards, mold or mildew growth, and compressed or wet insulation. Check that soffit and ridge vents are clear and unobstructed. Poor ventilation accelerates shingle deterioration from the inside out.
Step 3: Gutter and drainage check
Clogged gutters cause water to backflow toward fascia boards and walls, creating leaks even when the roof surface looks intact. Flush gutters with a garden hose and watch where water exits. Slow drainage or overflow at mid-span points to a blockage or a sag in the gutter run. Check downspout extensions to confirm water discharges at least four feet from the foundation.
Step 4: Close-range surface inspection (if safe)
If ground-level and attic checks reveal concerns that require confirmation, access the roof using a properly secured ladder and safety harness. Inspect shingle edges for curling or cupping. Press lightly on shingles near the ridge and valleys; soft or spongy areas indicate decking rot beneath. Check all pipe boot seals for cracking, and press flashing at chimneys, skylights, and wall intersections to confirm they are seated firmly.
Step 5: Algae and moss treatment
Algae growth shortens shingle lifespan by 5 to 10 years, making removal a top priority for long-term roof health. ARMA recommends soft washing using a 50/50 solution of household bleach and water, applied at low pressure between 50 and 150 PSI, with a 15 to 20 minute dwell time followed by a gentle rinse. Never use a pressure washer on asphalt shingles. Pressure washing voids most shingle warranties by stripping granules and accelerating surface degradation.
Pro Tip: Install zinc or copper strips along the ridge after cleaning. Rainwater carries trace metals down the roof surface, inhibiting algae regrowth for years without repeated chemical applications.
Seasonal task comparison
| Season | Priority tasks | What to watch for |
|---|---|---|
| Spring | Full inspection, algae treatment, gutter flush | Ice dam damage, lifted shingles, cracked caulk |
| Summer | Debris removal, ventilation check | Heat blistering, UV granule loss |
| Fall | Gutter cleaning, flashing seal check | Leaf accumulation, loose fasteners |
| Winter | Ground-level monitoring, snow removal | Ice dams, snow load on flat sections |
Common roof problems and how to spot them
Knowing what to look for turns a casual walk around your property into a productive roof inspection guide. These are the most common failure points:
-
Curling or cupping shingles: Edges that curl upward (cupping) or centers that buckle upward (clawing) signal moisture imbalance or age-related brittleness. Both conditions allow wind and water infiltration.
-
Missing shingle tabs: Even one missing tab creates a direct water entry point. Replace within 24 to 48 hours of discovery.
-
Flashing gaps: Metal flashing at chimneys, skylights, and wall intersections separates over time. Gaps wider than a credit card thickness require immediate resealing.
-
Pipe boot cracks: Rubber pipe boot seals around plumbing vents degrade in UV exposure. A cracked boot is one of the most common sources of attic leaks in Texas homes.
-
Sagging ridge or deck: Any visible sag in the ridge line or roof plane indicates structural compromise. This is not a DIY repair.
-
Granule-filled gutters: Consistent granule accumulation between storms means the shingles are past their protective lifespan.
A roof that looks fine from the street can be failing at the flashing, pipe boots, and decking level. Ground-level checks catch maybe half the story. The attic tells the rest.
For storm-related roof damage in Texas, hail impact is particularly deceptive. Hail bruises shingles without visibly displacing them, accelerating granule loss and reducing weather resistance. If your area experienced hail larger than one inch in diameter, schedule a professional inspection regardless of what the ground-level check shows.
How to maintain different roof types
Different roof materials require specific maintenance approaches, and using the wrong method can cause more damage than neglect.
| Roof type | Key maintenance focus | Common issues | DIY or pro? |
|---|---|---|---|
| Asphalt shingles | Granule retention, flashing seals, algae removal | Curling, granule loss, algae staining | Mostly DIY |
| Metal | Rust prevention, fastener tightening, sealant checks | Fastener backing, panel seam separation | DIY + pro for seams |
| Flat/low-slope | Drainage, membrane integrity, ponding water | Blisters, cracks, blocked drains | Pro recommended |
| Tile (clay/concrete) | Cracked tile replacement, underlayment condition | Cracked tiles, mortar deterioration | Pro for underlayment |
| Wood shake | Moss and rot prevention, split shake replacement | Rot, moss, fire risk | Pro for rot assessment |
For flat roofs, the flat roof inspection guide from Misterreroof covers membrane-specific checks that go beyond what a standard shingle checklist addresses. Flat roofs in Texas accumulate standing water faster than pitched roofs, and even a quarter inch of ponding water left for 48 hours accelerates membrane degradation.
Professional roof inspections cost $150 to $400 and are worth scheduling every few years or after severe weather, especially for roofs over 15 years old. That cost is a fraction of the $8,000 to $15,000 average for a full shingle replacement.
Pro Tip: For metal roofs, check fastener washers annually. Neoprene washers compress and crack over time, creating small but persistent leak points at every screw location.
Key takeaways
Consistent preventive roof care, performed twice yearly with post-storm checks, is the most cost-effective way to extend roof lifespan and avoid emergency repair costs.
| Point | Details |
|---|---|
| Inspect twice yearly | Schedule spring and fall inspections, plus a 48-hour post-storm ground check. |
| Start from the ground | 85% of roof problems are visible with binoculars, reducing unsafe roof access. |
| Check the attic first | Attic moisture and staining reveal leaks months before interior damage appears. |
| Use soft washing for algae | ARMA-approved bleach solution at low pressure protects shingles and preserves warranties. |
| Match maintenance to roof type | Asphalt, metal, flat, and tile roofs each require different inspection priorities and cleaning methods. |
What I’ve learned from watching homeowners skip the attic
Most homeowners treat roof maintenance as an exterior task. They walk the yard, look up, and call it done. The attic is where the real story lives, and it is the step I see skipped most consistently. I have reviewed inspection reports where the exterior looked acceptable but the attic showed active moisture intrusion, compressed insulation, and early-stage mold growth. The homeowner had no idea. The repair bill was significant.
My workflow recommendation is simple: start inside before you go outside. Spend ten minutes in the attic with a flashlight before you ever pick up the binoculars. What you find there tells you exactly where to focus your exterior inspection. It also tells you whether the problem is a surface issue or a structural one, which determines whether you handle it yourself or call a professional.
The other mistake I see regularly is treating photo documentation as optional. Documenting inspections with photos gives you a baseline for comparison across seasons and gives any professional you hire a clear picture of what changed and when. A photo taken in April and compared to one from October tells a more accurate story than memory ever will. Set up a simple folder on your phone labeled by date and location on the roof. It takes two minutes and has saved homeowners thousands in disputed insurance claims.
Consistent habits matter more than perfect technique. A thorough inspection done twice a year beats a perfect inspection done once every three years.
When maintenance is not enough: Misterreroof can help
When your inspection reveals damage beyond caulk and cleaning, Misterreroof provides professional roof replacement services across El Campo, Victoria, Hallettsville, and the greater Houston area. Their team specializes in metal roof replacement in Victoria, TX, shingle replacement, flat roof systems, and TPO installations built to handle Texas weather conditions. If your checklist turns up sagging decking, widespread granule loss, or repeated leak points that repairs have not resolved, a replacement assessment from Misterreroof gives you a clear picture of your options and costs. Contact Misterreroof today for a free estimate and stop patching a roof that has reached the end of its service life.
FAQ
How often should I perform a roof inspection?
Inspect your roof twice a year, in spring and fall, plus within 48 hours after any major storm. Monthly ground-level checks with binoculars catch obvious problems between formal inspections.
Can I inspect my roof without climbing on it?
Yes. 85% of roof problems are visible from the ground using binoculars, and an attic inspection reveals moisture issues that exterior checks miss entirely. Only access the roof surface when ground and attic checks confirm a specific area needs close examination.
What is the safest way to remove algae from shingles?
Use a 50/50 solution of household bleach and water applied with a pump sprayer at low pressure (50 to 150 PSI), following ARMA guidelines. Let it dwell for 15 to 20 minutes, then rinse gently. Never use a pressure washer, as it strips granules and voids most shingle warranties.
How do I know when to call a professional instead of doing it myself?
Call a professional for any sagging ridge line, suspected decking rot, widespread flashing failure, or any roof with a pitch steeper than 6:12. Professional inspections cost $150 to $400 and are recommended every 3 to 5 years for roofs over 15 years old.
Does roof type change what I should inspect?
Yes. Asphalt shingles require granule and flashing checks, metal roofs need fastener and sealant inspection, and flat roofs require drainage and membrane integrity assessment. Using the wrong cleaning or inspection method for your roof material can cause damage and void warranties.
