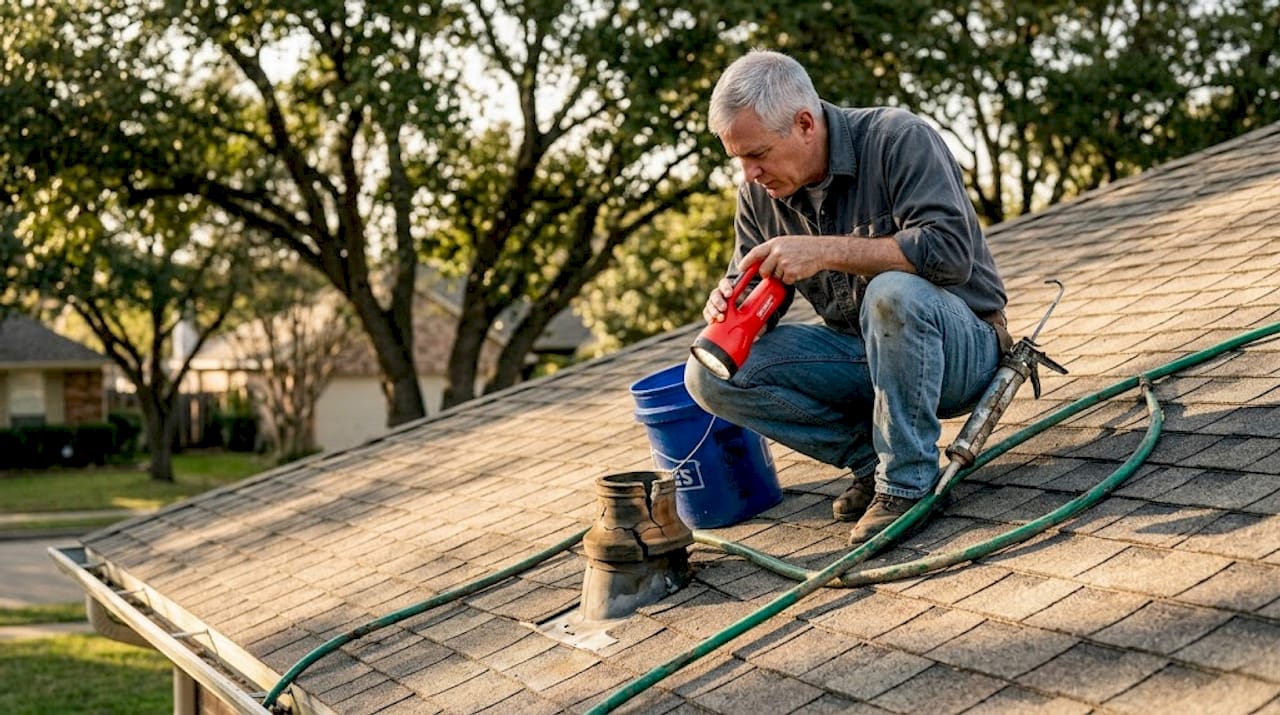
Roof leak repair guide: practical steps for Texas homeowners
Roof leak repair guide: practical steps for Texas homeowners
TL;DR:
- Texas homeowners often face recurring roof leaks due to extreme UV, heat, and weather stresses. Proper diagnosis, using durable materials, and routine maintenance are essential for long-lasting repairs in Texas climates. When DIY becomes challenging, professional roof services ensure effective, lasting solutions tailored to local conditions.
You’re sitting in your living room during a Houston downpour when you spot it: a spreading water stain on the ceiling, growing darker by the minute. Your stomach drops. That sinking feeling is familiar to countless Texas homeowners, and it’s the exact moment where having a clear, practical plan makes all the difference. This guide walks you through finding the leak, fixing it the right way, and testing your work so you can face the next storm with confidence. Texas climate, Texas materials, and real repair steps are all factored in.
Table of Contents
- What you need before you start: Tools, materials, and safety
- Step 1: How to locate and diagnose roof leaks
- Step 2: Roof leak repair methods for Texas homes
- Step 3: Testing your repair and preventing future leaks
- Expert perspective: What most guides miss about Texas roof leaks
- Get professional help for lasting peace of mind
- Frequently asked questions
Key Takeaways
| Point | Details |
|---|---|
| Start with safety | Always use fall protection and gather all tools before climbing onto your roof. |
| Diagnose the source | Leaks often travel from penetrations, so trace water paths and inspect around pipes and flashing. |
| Use Texas-ready materials | Choose roofing materials and sealants that withstand high heat and sun for longer-lasting repairs. |
| Test your fix | After repairs, carefully water-test the area and recheck after every major storm. |
| Know when to call a pro | Persistent leaks, complex repairs, or unsafe conditions mean it’s time for licensed roofing help. |
What you need before you start: Tools, materials, and safety
With a clear overview of what this guide will achieve, it’s time to gather the essentials needed for a safe and effective repair.
Safety is non-negotiable. Before you climb anything, put on rubber-soled shoes, heavy work gloves, and eye protection. If your roof pitch is steep (anything above 6:12, meaning 6 inches of rise for every 12 inches of run), you need a personal fall arrest harness. Even a one-story fall causes serious injury. No repair is worth that risk.
Here’s what to have ready before stepping outside:
Tools:
- Flat pry bar and hammer
- Roofing nail gun or roofing nails (1.75-inch galvanized)
- Utility knife and replacement blades
- Caulk gun
- Stiff brush for cleaning surfaces
- Garden hose for testing
- Flashlight and inspection mirror for attic work
Materials:
- Replacement asphalt shingles matched to your current roof color and thickness
- Roofing cement (also called roofing mastic)
- Step flashing and counter flashing (pre-bent aluminum or galvanized steel)
- Replacement pipe boots (neoprene or rubber, UV-rated for Texas)
- Self-adhesive ice and water shield (used under flashing in Texas)
- Rubber-washer roofing screws for boot installation
The table below shows basic versus upgraded options, especially important given roofing durability in Texas under intense UV and heat.
| Component | Basic option | Upgraded Texas option |
|---|---|---|
| Pipe boot | Standard rubber | UV-stable silicone or EPDM boot |
| Flashing | Plain aluminum | Galvanized steel or copper |
| Sealant | Standard roofing cement | Polymer-modified cement, heat-rated |
| Shingles | 25-year standard asphalt | Durable roofing choices rated 130 mph wind |
| Underlayment | Felt paper | Synthetic or self-adhered membrane |
Safety warning: Falls from roofs are a leading cause of construction fatalities. Work with a buddy who stays on the ground. Never work on a wet or icy surface, and be cautious stepping on asphalt shingles on hot days as they soften and become slippery. For Texas heat, use durable materials rated for extreme temperature swings.
Pro Tip: Stage all your materials in a bucket the night before. The less time you spend searching for tools on the roof, the less exposure time you rack up in Texas heat. Pre-cut any shingle sections to size on the ground before going up.
Step 1: How to locate and diagnose roof leaks
Once you’re equipped and aware of safety, the next step is identifying exactly where the leak originates.
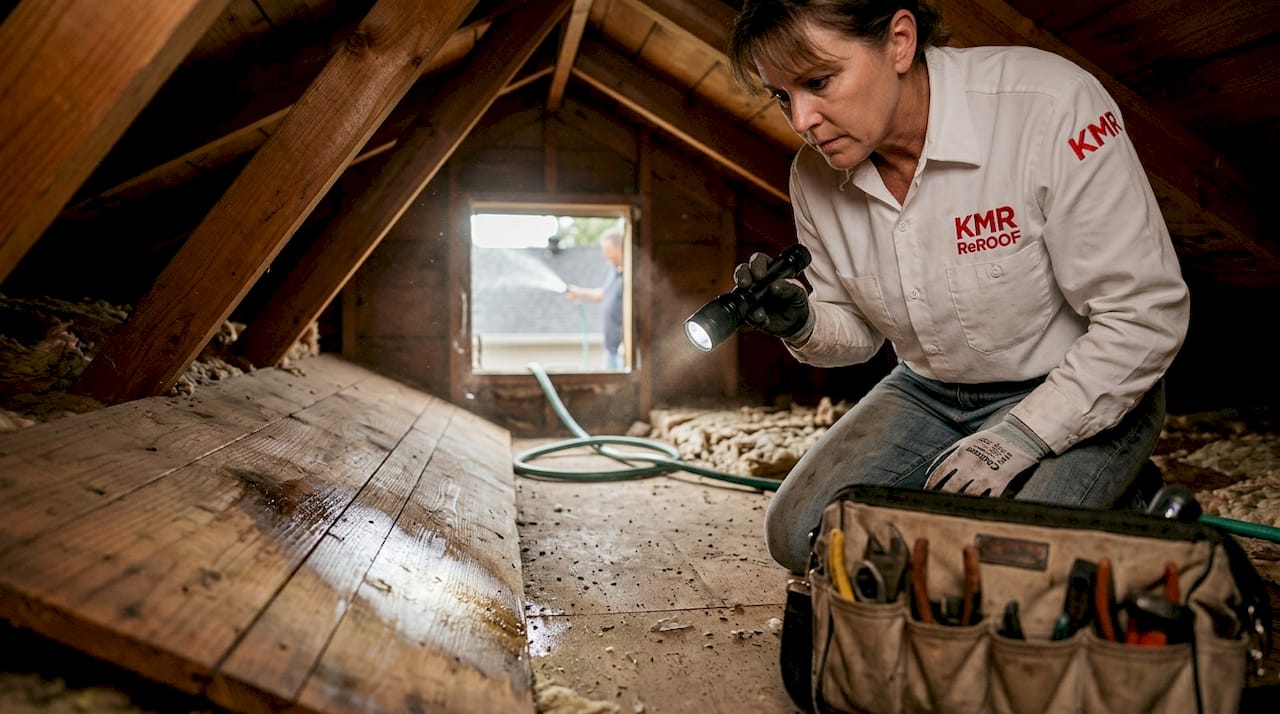
Most homeowners make the mistake of looking straight up at the wet ceiling stain and assuming the leak is directly above. Water doesn’t work that way. It enters at one point, runs along a rafter or roof deck, and drips somewhere else entirely. Tracking it backward is the real skill.
Follow this numbered process:
- Start in the attic during daylight. Turn off all lights and look for daylight peeking through. Also look for dark staining, mold, or wet insulation on rafters and the roof deck. These trails tell you which way water traveled.
- Trace the stain uphill. On a sloped roof, water always enters higher than where you see damage. Follow the wet trail toward the ridge, not toward the eaves.
- Check penetrations first. Roof penetrations like pipe vents, chimneys, skylights, and HVAC curbs are the most common entry points. Before blaming shingles, inspect everything that punches through your roof plane.
- Inspect step flashing and valleys. Where a roof meets a wall or where two roof planes meet, flashing keeps water out. Lifted, cracked, or missing flashing is a classic Texas leak culprit, especially after hail events.
- Look for nail pops and cracked caulking. Sometimes a single roofing nail backed out just enough to let water seep around it. Run your hand along exposed nail heads and feel for movement.
- Check pipe boots carefully. Rubber boots around plumbing vents crack and shrink in Texas UV. A cracked boot often mimics a shingle leak and is frequently overlooked on first inspection.
“If you’re not sure, don’t guess. Water can travel far from the entry point. Overlooking attic clues can cause bigger issues downstream, including rot in your decking and mold in your insulation.”
Pro Tip: On a dry, sunny day, have someone run a garden hose slowly over sections of the roof while you watch from the attic. Start low and move up systematically. When dripping appears inside, you’ve isolated the zone. This mimics a slow rain better than a downpour and makes diagnosis far more accurate. For broader context on how Texas storms stress your roof, reviewing storm-resistant roofing methods gives useful background.
Step 2: Roof leak repair methods for Texas homes
Having identified the exact problem area, you’ll use the following tested techniques to restore your roof’s integrity.
Texas summers push surface temperatures past 160°F on dark shingles. That changes how materials behave during repair. Sealants must be heat-rated, shingles become pliable and can tear easily, and cold-installed adhesives may not bond properly in extreme heat or cold. Use these specific techniques for each repair type.
Shingle repair
- Carefully lift the tabs of surrounding shingles using a flat pry bar. Work slowly on hot days since shingles tear easily.
- Remove the damaged shingle by pulling the roofing nails. Slide the old shingle out.
- Slide the new, matching shingle into place. Nail it with four nails approximately 1 inch from each edge, just above the adhesive strip line.
- Apply a dab of roofing cement under the overlapping tabs of adjacent shingles to re-seal them.
- Press all tabs down firmly. In cool weather, warm the cement slightly with a heat gun to get a proper bond.
Flashing repair
- Clean the area around the flashing with a stiff brush to remove old caulk, debris, and algae.
- Carefully loosen surrounding shingles to access the flashing base.
- If the flashing is simply lifted or loose, re-seat it and seal the edges with polymer-modified roofing cement. For Texas heat, use galvanized or copper flashing for longer service life.
- If the flashing is cracked or severely rusted, remove it entirely and install new step flashing, weaving it under shingles as you work uphill.
- Seal all exposed edges with roofing cement and press firmly.
Pipe boot replacement
- Cut away the old rubber boot using a utility knife, working carefully around the pipe.
- Clean the pipe and roof deck surface thoroughly with a stiff brush.
- Slide the new boot over the pipe and down flat against the roof deck.
- Secure the boot flange with rubber-washer roofing screws at 6-inch intervals. Do not over-tighten.
- Apply roofing cement around the base of the boot flange where it meets the shingles, sealing the edge completely.
| Repair type | Average DIY time | Difficulty level | When to call a pro |
|---|---|---|---|
| Single shingle swap | 30 to 60 minutes | Moderate | Multiple courses damaged |
| Step flashing repair | 1 to 2 hours | Moderate to hard | Chimney or skylight flashing |
| Pipe boot replacement | 45 to 90 minutes | Moderate | Boot near ridge or valley |
| Valley flashing | 2 to 4 hours | Hard | Any significant valley damage |
Pro Tip: For cool roofing options and maximum sealant longevity, choose a product rated for temperatures between -20°F and 200°F. Standard roofing cement softens and migrates in a Texas summer and can actually create new gaps as it flows away from the joint. Polymer-modified or silicone-based sealants hold their shape far better. Over time, these small upgrades add up to real roofing savings by reducing repeat repairs.
Step 3: Testing your repair and preventing future leaks
You’ve completed the hands-on repairs; now it’s crucial to ensure your fix stands up to Texas weather and to make smart choices for future protection.
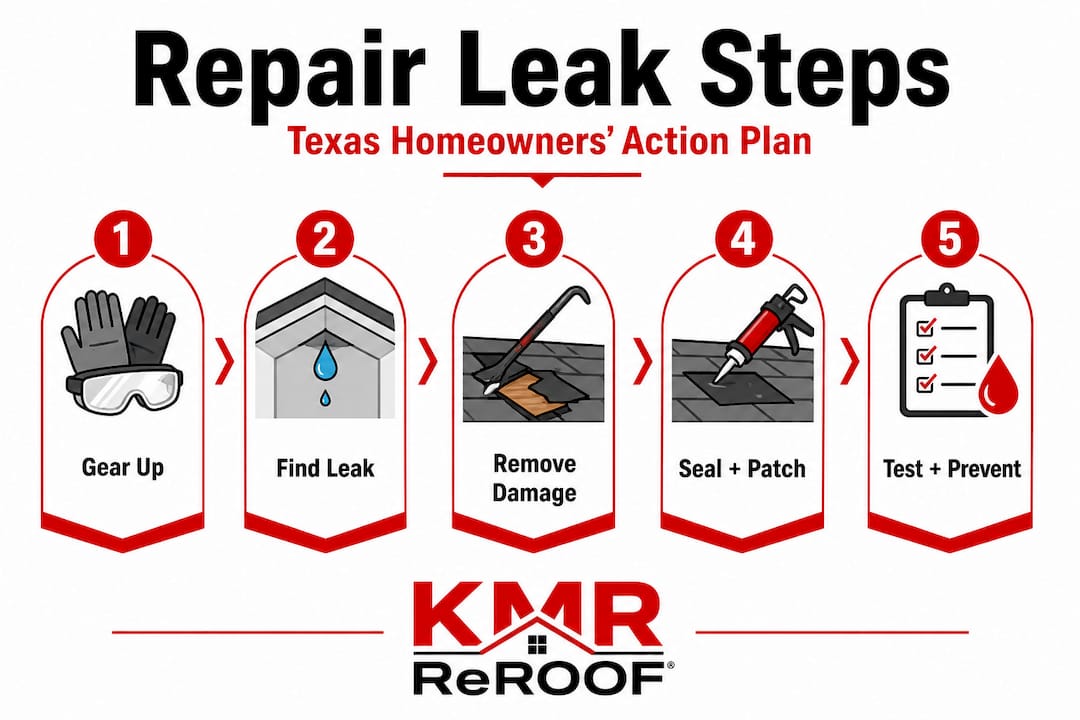
Water testing your repair is straightforward. On a dry day, use a garden hose to saturate the repaired area for at least five minutes. Have someone watch from inside the attic with a flashlight. Start below the repair zone and slowly move the hose upward. If no water appears inside after a thorough soak, the repair is sealed. Give it 24 hours and check the attic again to catch any slow seepage.
Small, shallow issues are realistic DIY candidates on dry days, but water paths can be tricky to fully close. If water reappears after your test, the leak source may be larger than it appeared, and a licensed roofer is the safer, more lasting path forward.
Routine maintenance dramatically reduces future leaks. Here’s what to check after every significant storm or at least twice a year:
- Inspect all pipe boots for cracking, separation, or lifting at the flange
- Check all step flashing and counter flashing for gaps or lifting
- Look for missing, cracked, or curled shingles, especially along ridges and valleys
- Clear gutters and downspouts of debris (blocked gutters cause water to back up under shingles)
- Trim overhanging branches that can abrade shingles during high winds
- Check attic ventilation: poor airflow accelerates heat damage to the deck and shingles above
Upgrading your roofing system with better materials during routine repairs is often the smartest long-term play for Texas homeowners. If you’re already up on the roof replacing a pipe boot, spending a little more on a UV-stable silicone model instead of basic rubber pays off significantly over the next decade.
Expert perspective: What most guides miss about Texas roof leaks
Most roof repair guides treat leaks as isolated events. Fix the shingle, pat yourself on the back, move on. But in Texas, that thinking leads to the same homeowner back on the roof every year, patching the same section, wondering why it keeps failing.
The real issue is that Texas weather is especially hard on roofing components. Intense UV radiation, temperature swings from 20°F in winter to 110°F in summer, hurricane-force winds, and hailstorms all stress materials simultaneously. A rubber pipe boot in Texas sun degrades far faster than the manufacturer’s rating suggests, because those ratings assume a temperate climate, not the Gulf Coast. The same applies to standard roofing cements and basic aluminum flashing.
“Most leaks start small but expand quickly. Don’t let the ‘just a drip’ mindset fool you. By the time you see water inside, the roof deck below may have been saturated for weeks.”
What smart homeowners in El Campo and Houston do differently is treat each repair as a diagnostic moment. Every time you get on the roof, document what you see. Take phone photos of every component, date them, and keep a simple log. When you review those photos after the next storm, patterns emerge. You’ll see which boots are aging fastest, where flashing is starting to lift, and which shingles are losing their granules fastest on the south-facing slopes.
Pro Tip: When replacing any flashing or boot, go one grade up. The cost difference between standard aluminum flashing and galvanized steel is often under $20 per section, but the service life difference in Texas conditions can be 10 to 15 years. Eco-friendly roofing options like metal and recycled-content materials also resist heat and UV far better than entry-level products, making them doubly valuable in the Texas climate.
The other thing guides rarely say: document when you don’t find damage. Knowing your roof was fully intact before a major storm is powerful information if you ever need to file an insurance claim or prove the source of new damage.
Get professional help for lasting peace of mind
If you’re ready for no-stress solutions or your problem goes beyond DIY, here’s the fastest path to professional results.
Some leaks are genuinely too complex or widespread to safely tackle yourself, and that’s not a failure. It’s just reality. Persistent leaks, damage near chimneys or skylights, multiple failing components, or anything involving structural decking absolutely warrant a professional evaluation.

Mister ReRoof specializes in exactly these situations across El Campo and Houston. Whether you need a full metal roof replacement in Victoria, a shingle roof replacement in El Campo, or a flat roof replacement in El Campo, the team brings Texas-specific expertise and materials chosen for local climate realities. Get a free estimate today and stop worrying every time the sky clouds over.
Frequently asked questions
How can I tell if my roof leak is an emergency?
If water is actively dripping, ceilings are bulging, or you see daylight through the roof deck, treat it as an emergency and call a professional immediately. Small, shallow issues can wait for dry weather, but active or structural damage cannot.
What’s the most common cause of leaks in Texas roofs?
Damaged flashing and failed pipe boots top the list, accelerated by Texas heat and UV exposure. Pipe boot failure and deteriorated flashing sealants together account for a large share of residential roof leaks in the region.
Can I patch a leak during a rainstorm?
Temporary products like roofing tape can slow active water intrusion, but a proper repair requires dry conditions for materials to bond correctly. Patch in the storm if you must, then redo the repair on a clear day.
Why do pipe boots fail so often in Texas?
Rubber degrades rapidly under sustained UV exposure and heat cycling, causing cracking and separation at the boot base. UV-related failure is especially common on south and west-facing roof slopes. Upgrading to silicone or EPDM boots rated for extreme climates significantly extends service life.
