
TL;DR:
- A commercial roof safety checklist helps property managers ensure inspections and maintenance meet OSHA standards. Regular bi-annual inspections can extend roof life and reduce costly emergency repairs. Proper documentation and defect triage protect assets, lower liability, and facilitate compliance.
A commercial roof safety checklist is a systematic tool property managers and business owners use to confirm that roof inspections, maintenance tasks, and fall protection measures meet regulatory standards. Neglecting this process carries real financial risk. Preventive bi-annual inspections can extend a roof’s lifespan by 5–10 years and reduce emergency repair costs that run 3–5 times higher than planned maintenance. OSHA 29 CFR 1926 Subpart M sets the legal floor for fall protection on commercial roofs, and failing to meet it exposes your business to citations, lawsuits, and insurance gaps. This guide gives you the exact framework to stay compliant and protect your asset.
What does a commercial roof safety checklist require for fall protection?
Fall protection is the non-negotiable foundation of any roof safety inspection. OSHA 2026 standards require fall protection for any work performed 6 feet or more above a lower level on commercial roofs. Three systems satisfy that requirement: guardrail systems, safety nets, and personal fall arrest systems (PFAS).
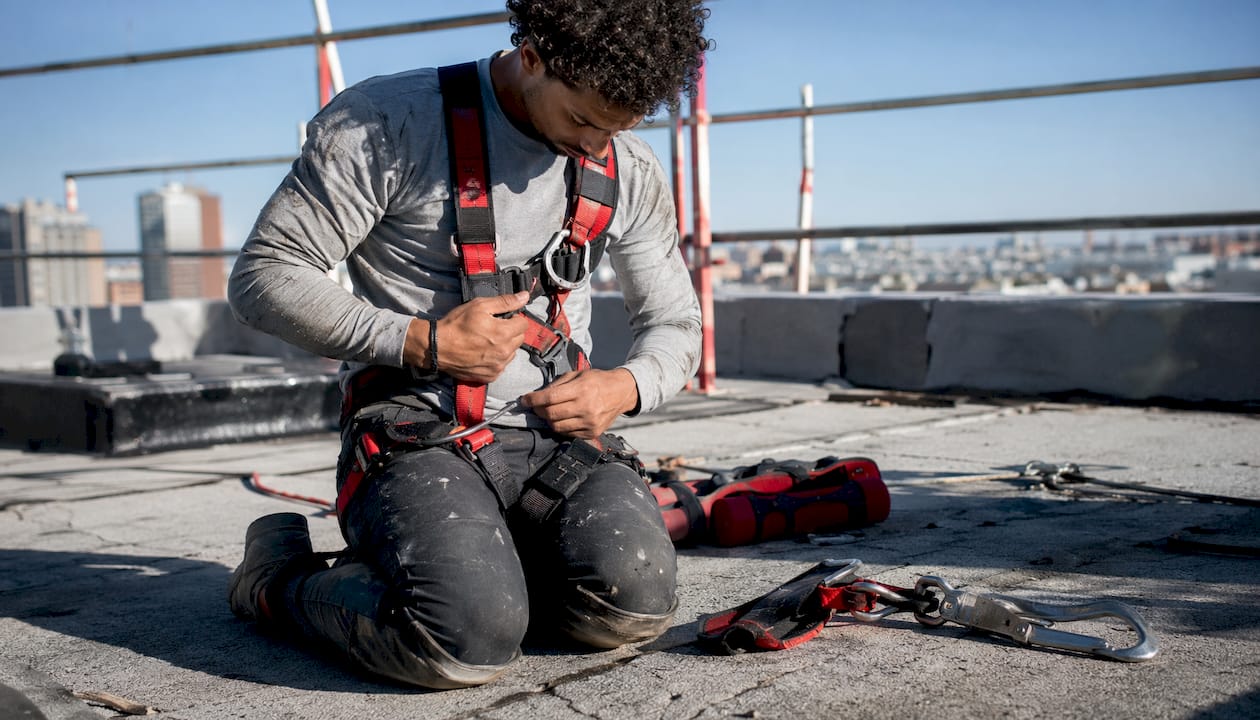
Each system has specific rules. Guardrails must reach 42 inches in height and withstand 200 pounds of outward or downward force. Safety nets must be installed as close as possible below the work surface. PFAS anchors carry the most critical specification: every anchor must support at least 5,000 pounds per attached worker or carry engineer certification with a qualified person’s sign-off. Missing that certification is one of the most common OSHA citation triggers on commercial roofs.
Low-slope roofs (those with a pitch of less than 4:12) have an additional option: a combination of a warning line system and a safety monitoring system. Steep roofs require conventional fall protection at all times. Relying solely on slide guards no longer satisfies OSHA in 2026.
Your checklist for fall protection equipment must include:
- Guardrail integrity: Check for missing sections, loose posts, and correct height (42 inches, with a mid-rail at 21 inches).
- PFAS harness condition: Inspect for frayed webbing, corroded hardware, and expired inspection tags.
- Anchor point certification: Confirm 5,000-pound load rating or engineer sign-off is on file.
- Safety net clearance: Verify nets are positioned within the required distance below the work area.
- Warning line placement: Confirm lines are set at least 6 feet from unprotected edges on low-slope roofs.
- Training records: Verify every worker on the roof has documented fall protection training.
- Weekly inspection tags: Confirm all PFAS equipment carries a current weekly inspection tag.
Pro Tip: Test harness D-ring compatibility with your building’s specific anchor points before any crew goes up. Incompatible hardware is the most overlooked compliance failure and raises citation risk by 40%.
How to perform a thorough commercial roof inspection step by step
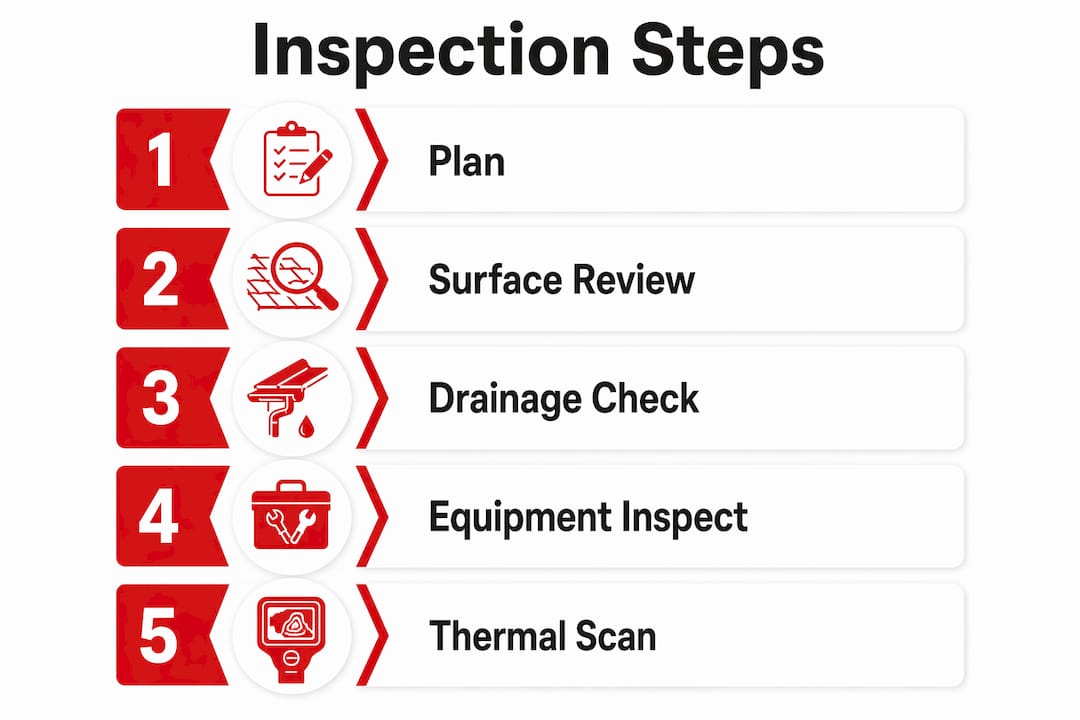
A thorough roof inspection follows a fixed sequence. Skipping steps or inspecting in random order creates gaps that show up later as missed defects and denied insurance claims.
Pre-inspection planning
Schedule inspections in dry weather, at least 24 hours after rain. Wet surfaces hide true membrane conditions and create slip hazards. Confirm all fall protection equipment is in place before anyone steps onto the roof. Assign one inspector to document and one to physically assess, so no area gets missed.
Systematic surface and seam review
Walk the membrane in parallel passes, like mowing a lawn. Look for blisters, punctures, surface erosion, and open seams. Pay close attention to field seams on TPO and EPDM membranes, where heat-welded or adhesive bonds are most likely to fail first. Check all flashing at walls, curbs, and penetrations for lifting, cracking, or separation.
Drainage and ponding water assessment
Standing water that does not drain within 48 hours is a critical failure indicator, not just a surface nuisance. It accelerates membrane degradation and adds structural load. Clear all drains, scuppers, and gutters of debris. Record any low spots where water pools consistently.
Rooftop equipment and parapet inspection
Check HVAC curbs, pipe penetrations, and equipment pads for cracked sealant and displaced flashing. Inspect parapet walls for spalling, efflorescence, or cracks that allow water intrusion behind the membrane. Loose coping caps are a common entry point for water that goes undetected for months.
Advanced detection with infrared thermal scanning
Visual inspection alone misses moisture trapped inside insulation layers. Infrared thermal scanning after clear weather identifies wet insulation that is invisible to the naked eye. Schedule scans in the late afternoon when the temperature differential between wet and dry insulation is greatest.
| Inspection Step | Method | Key Indicator |
|---|---|---|
| Membrane surface | Visual walk in parallel passes | Blisters, punctures, open seams |
| Flashing and penetrations | Close-up visual and probe | Lifting, cracking, separation |
| Drainage systems | Physical clearing and flow test | Standing water after 48 hours |
| Rooftop equipment | Visual and sealant probe | Cracked caulk, displaced flashing |
| Insulation condition | Infrared thermal scan | Temperature anomalies indicating moisture |
| Parapet and coping | Visual and tap test | Spalling, loose caps, efflorescence |
Document every finding with geotagged photos that include weather conditions, the inspector’s name, and a severity rating. This record protects manufacturer warranties and satisfies insurance underwriters.
How should you categorize and prioritize roof defects after an inspection?
Defect triage separates property managers who control costs from those who react to emergencies. Every finding from a roof inspection belongs in one of three tiers: urgent, routine, or monitor.
Urgent defects require repair within 30 days. Active leaks, open membrane seams, failed flashing at penetrations, and blocked drains all fall here. Delaying urgent repairs converts a targeted fix into a full-section replacement. Emergency repair costs run 3–5 times higher than planned work, which makes speed on urgent items a financial decision, not just a safety one.
Routine defects allow a 90-day repair window. Minor seal failures at equipment curbs, surface erosion without membrane breach, and small isolated blisters fit this category. Schedule these repairs in your next planned maintenance cycle to keep costs predictable.
Monitor items need no immediate repair but require documentation and re-inspection at the next scheduled visit. Cosmetic surface wear, minor parapet cracks without active water intrusion, and early-stage granule loss on modified bitumen surfaces belong here. The risk is reclassification. A monitor item that worsens between inspections becomes a routine or urgent defect, so accurate severity ratings at the time of inspection matter.
Pro Tip: Build your defect triage directly into your capital planning calendar. Roof inspections integrated into property capital planning shift your maintenance posture from reactive to preventive, which is where the real cost savings live.
The cost math is straightforward. A $400 sealant repair on a routine curb defect, left unaddressed for two seasons, can become a $4,000 insulation replacement and membrane repair. Triage is not bureaucracy. It is budget management.
What documentation and reporting practices protect property managers from liability?
Documentation is the difference between a defensible compliance record and an expensive legal exposure. A roof inspection report filed more than 48 hours after the inspection loses credibility with insurers and regulators. Complete reports within that window, every time.
Every report must include:
- Inspector identification: Full name, certification level, and company affiliation.
- Date, time, and weather conditions at the time of inspection.
- Geotagged photographs for every defect, with location references tied to a roof diagram.
- Severity ratings for each finding (urgent, routine, or monitor).
- Measurements of affected areas to support repair scoping and cost estimates.
- Drainage observations including any ponding water locations and drain conditions.
- Equipment and anchor point status with certification expiration dates noted.
A written fall protection safety plan is a separate, required document. OSHA Voluntary Protection Program participants who enforce written safety plans signed by upper management see 30% lower citation rates. The plan must be signed by upper management, not just a site foreman. That distinction matters to OSHA inspectors and to your insurance carrier.
Monthly self-audits using OSHA 1926 Subpart M as the benchmark uncover training gaps before an inspector does. Maintain a “roof book” for each property: a running record of every inspection report, repair invoice, training certificate, and anchor point certification. Digital platforms that timestamp uploads and flag expiring certifications make this process far less labor-intensive than paper binders. For a deeper look at how to inspect commercial roofs systematically, Misterreroof has a dedicated property manager’s guide worth bookmarking.
Key Takeaways
A commercial roof safety checklist is the most cost-effective tool a property manager has to prevent emergency repairs, OSHA citations, and warranty voids.
| Point | Details |
|---|---|
| Fall protection is mandatory | OSHA requires guardrails, safety nets, or PFAS for any work 6 feet or more above a lower level. |
| Anchor certification is non-negotiable | Every PFAS anchor must support 5,000 pounds or carry engineer certification with qualified sign-off. |
| Triage defects into three tiers | Urgent repairs within 30 days, routine within 90 days, and monitor items at the next scheduled inspection. |
| Document within 48 hours | Inspection reports filed after 48 hours lose credibility with insurers and regulatory bodies. |
| Written safety plans reduce citations | OSHA VPP data shows 30% lower citation rates when written plans are signed by upper management. |
What most property managers get wrong about roof safety plans
The biggest mistake I see is treating the commercial roof safety checklist as a one-time compliance exercise rather than a living management tool. Property managers complete an inspection, file the report, and move on. Then 11 months later, they repeat the process with no memory of what changed in between.
The rescue plan is the most overlooked item on every checklist I have reviewed. OSHA 1926.501(d)(13) requires a feasible emergency rescue plan that can be executed within 15 minutes. Most property managers have a plan on paper. Very few have tested whether their harness D-rings are actually compatible with their building’s anchor points. That single oversight is the leading cause of OSHA citations on commercial roofs, and it takes about 20 minutes to verify.
Leadership commitment separates compliant buildings from cited ones. A safety plan signed by a site foreman carries far less weight than one signed by the building owner or property management director. OSHA inspectors look at who signed the plan. So do plaintiffs’ attorneys.
My honest recommendation: schedule a roof safety review at the same time you schedule your annual budget meeting. Roof inspection data belongs in your capital planning spreadsheet, not in a filing cabinet. When you treat roof condition as a financial variable, you make better decisions about repair timing, reserve funding, and replacement cycles. That shift in thinking is worth more than any single inspection.
— Results
Misterreroof supports your commercial roofing compliance
Commercial roof safety is not just about passing inspections. It is about protecting the building, the people inside it, and the investment you manage every day.
Mister Reroof specializes in commercial roof replacement and maintenance across El Campo and Houston, TX, with expertise in TPO, flat, metal, and shingle roofing systems built to handle Texas weather. Whether your inspection revealed urgent repairs or your roof is approaching end of life, Misterreroof delivers workmanship that holds up and documentation that satisfies insurers. Start with the Texas roof replacement guide to understand your options, or contact Misterreroof directly for a free estimate on your next commercial roofing project.
FAQ
What is a commercial roof safety checklist?
A commercial roof safety checklist is a structured document property managers use to verify that roof inspections, fall protection equipment, and maintenance tasks comply with OSHA standards and manufacturer requirements.
How often should a commercial roof be inspected?
Commercial roofs should be inspected at least twice per year, typically in spring and fall. Bi-annual inspections can extend roof lifespan by 5–10 years compared to reactive maintenance.
What fall protection does OSHA require on commercial roofs?
OSHA 29 CFR 1926 Subpart M requires guardrails, safety nets, or personal fall arrest systems for any work 6 feet or more above a lower level. Low-slope roofs may use a warning line and safety monitoring system combination.
What should a roof inspection report include?
Every report must include the inspector’s name, date, weather conditions, geotagged photos, severity ratings for each defect, and measurements of affected areas. This documentation protects warranties and supports insurance claims.
How do you prioritize roof repairs after an inspection?
Categorize defects as urgent (repair within 30 days), routine (repair within 90 days), or monitor (re-inspect at the next scheduled visit). Urgent items like active leaks and open seams carry the highest cost risk if delayed.
